How to Make Waffles (Bigger, Fluffier and Better Than Ever)
Desire to know the secret to making eating place-way waffles? Follow along as our Test Kitchen experts share their tips.
If y'all've ever been to an IHOP or Waffle House or stood in line for a continental breakfast, you've likely seen the gilded behemoths I like to call restaurant-style waffles. Large, pillowy and then very tall, these aren't the frozen hockey pucks you had as a kid (and, frankly, those pale in comparison). With a pat of butter, some maple syrup and a bottomless cup of java, these waffles are the highlight of whatsoever diner-manner breakfast. But I've got great news for y'all: You can make them at domicile. Don't miss our complete collection of secret recipes for archetype diner food, here.
Our food editor James Schend knows there's no need to place an order with Alice for these diner delights. The key to making restaurant-style waffles from scratch is in a few simple steps.
Secret #one: Whip the egg whites
Yes, this sounds similar a pain—just trust us, the end result is worth information technology. Whipped egg whites add extra air to the batter, guaranteeing waffles that'll ascension to their fluffiest potential. Use a handheld or stand mixer to make the job easy.
Clandestine #2: Break out the pop
We dearest it when soda pop finds its way into recipes. (Here are 12 vivid ways to use cola around the house.) For waffles, we like to use club soda to requite the batter extra fluff. Its fizzy carbonation helps waffles rise as they melt.
Hush-hush #3: Use cornstarch
This thickening agent isn't just for sauces. Supervene upon a portion of the flour with cornstarch to continue the waffle well-baked and brown on the outside and tender and fluffy on the inside.
What better way to try out these tips than to whip upwardly a batch of waffles? Try this footstep-by-step recipe with tips from our Test Kitchen.
How to Make Waffles
You lot'll demand:
- 2 large eggs
- one-1/2 cups all-purpose flour
- one/two loving cup cornstarch
- 1 teaspoon blistering powder
- 1/2 teaspoon baking soda
- 1/2 teaspoon salt
- one/ii cup two% milk
- 5 tablespoons canola oil
- 2 teaspoons vanilla extract
- one teaspoon white vinegar
- 2 tablespoons sugar
- ane/2 loving cup cold club soda
Step 1: Combine the moisture and dry ingredients in separate bowls

Let's get crackin'. Begin by separating the eggs. Identify the whites into a clean, dry out bowl and allow stand up at room temperature for 30 minutes. Meanwhile, place the egg yolks in a split pocket-size bowl.
Examination Kitchen tip: Why the await? It'southward easiest to split up eggs while they're still cold, simply it's all-time for egg whites to accomplish room temp before they're beaten. Room temperature whites whip to loftier heights.
In a big basin, whisk together the flour, cornstarch, baking powder, baking soda and salt. Into the bowl with the yolks, add the milk, oil, excerpt and vinegar. Whisk until composite.
Exam Kitchen tip: Whisking the dry ingredients together before calculation the wet ingredients helps distribute the blistering pulverization. This ensures that the waffles get an even rising. Want to become higher up and across? Use an one-time-fashioned flour sifter to add the dry ingredients to the bowl, then whisk.
Step 2: Beat the egg whites
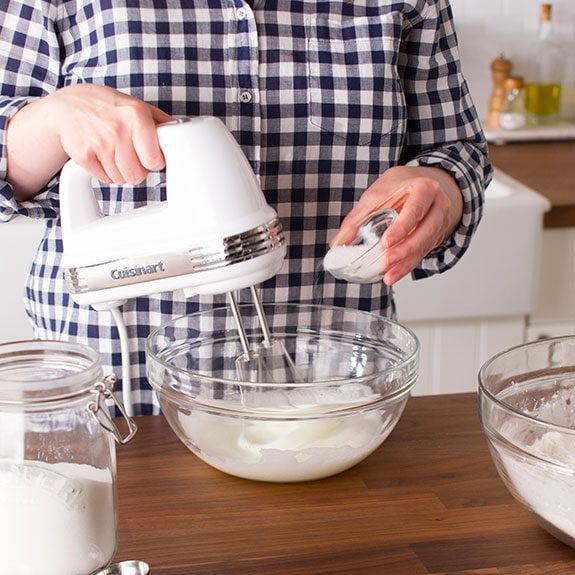
Next up, beat the eggs whites-just as if y'all were making a meringue. Not familiar with the steps? Don't worry; we've got yous.
Have out your stand mixer or a hand mixer (or summon some forcefulness and employ a handheld whisk). Beat out the egg whites continuously until soft peaks form. At this betoken, the egg whites should slump off of the whisk, forming a gentle peak that slowly falls back into the bowl. Once this happens, you lot tin start adding the saccharide. Add it gradually, one tablespoon at a time, and beat until stiff peaks form. At this point, the egg whites volition stick to the whisk, forming sturdy peaks similar to whipped foam. Here'due south the deviation between soft and stiff peaks.
Exam Kitchen tip: We know this step sounds fussy, just don't skip it! Browbeaten egg whites are essential to giving waffles a texture that's low-cal simply even so holds its shape.
Step 3: Combine the wet and dry ingredients

Phew! The hard part is done. We're almost at the domicile stretch, so it'south time to turn on the waffle maker.
While the iron is heating up, pour the wet ingredients basin into the dry ingredients. Stir with a condom spatula, scraping the walls of the basin then every last bit gets combined. Side by side, uncap the club soda and pour it into the mix. Slowly stir the ingredients together.
Test Kitchen tip: For a traditional have, we use plain club soda, but feel costless to utilize any flavour yous have on hand to give the waffles a subtle fruit flavour. Just be warned: do not use sparkling water as a substitute. They may expect akin, but club soda has much more powerful bubbles than sparkling water.
Footstep 4: Fold in the egg whites
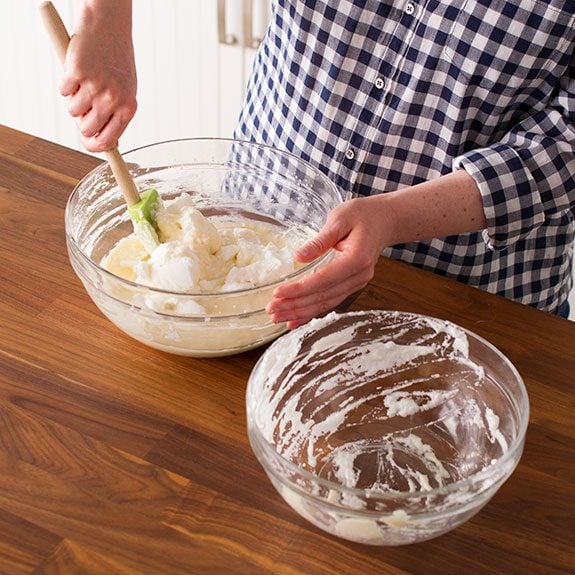
The batter is most in that location; the only pace remaining is to fold in the egg whites. Folding is quite different from whisking. Instead of combining ingredients at a breakneck speed, you'll want to gently incorporate the egg whites into the concoction. Using a rubber spatula, gently add together the egg whites to the batter. Then, with a deep scooping movement, slowly combine the ingredients, "folding" the concoction into itself. Stop when no big blobs of egg white remain.
Test Kitchen tip: Conscientious folding is critical to avoid deflating the egg whites. The air trapped within the whites is what gives this waffle its fluffy texture. Information technology's totally OK if you can still meet traces of beaten egg white left in the batter.
Step 5: Cook

Since each waffle iron is different, we suggest cooking the batter co-ordinate to the manufacturer's directions. (Nosotros honey this Hamilton Beach waffle iron because it allows for you lot to melt four waffles at a time.) In general, all the same, yous'll pour a scoop of batter across the iron, close the lid and let it cook. A large waffle typically takes around v minutes to melt, and the best manner to tell if it's done is to accept a peek. The waffle should be nicely risen and gold brown.
Pace 6: Savour
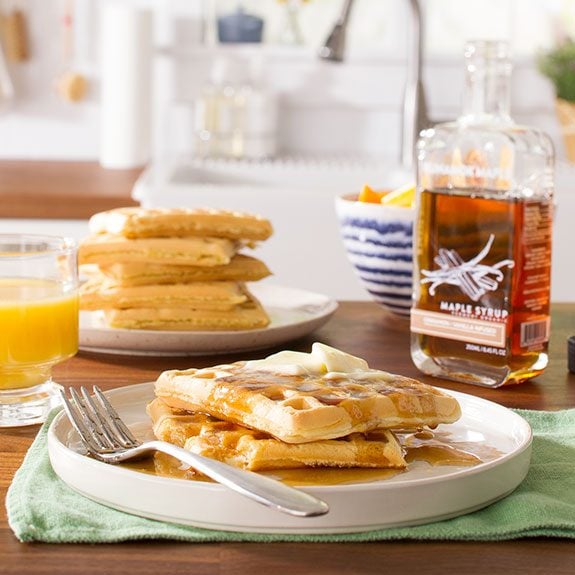
Ding-ding! Your big, beautiful waffle is prepare to serve. It's divine with just a pat of butter and a drizzle of maple syrup, or you tin treat yourself to a mountain of whipped cream. (Skip the canned stuff and make it from scratch instead!) To have things to the next level, check out our ideas for over-the-peak waffle toppings. Nosotros cover succulent additions, both savory and sweetness.
How to Keep Waffles Warm
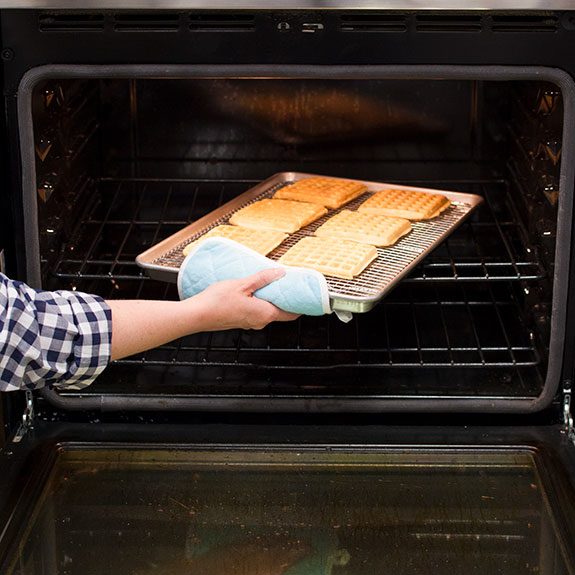
Our recipe yields roughly a dozen waffles. To ensure the entire batch is warm when it hits the table, place waffles on a baking rack that's been set on a baking canvass. Then, stick them in an oven set to 200 degrees. This will keep them warm and, ameliorate yet, well-baked them up a bit. No soggy, lukewarm waffles for your crowd!
Can you freeze waffles?
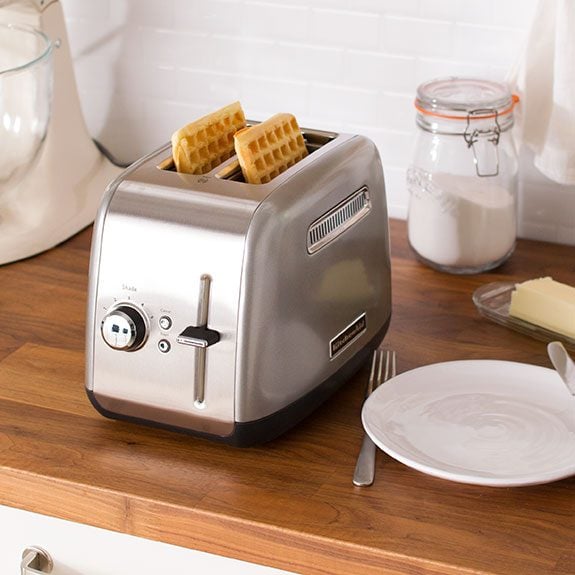
Yes, you lot can. Leftover waffles are like shooting fish in a barrel to freeze (much similar these other freezer-friendly foods). Wrap them individually then stick 'em in the freezer for a quick breakfast later on in the week. When you're ready to eat, simply pop one in the toaster or toaster oven to reheat.
Endeavor This Next
There are plenty of ways to serve waffles. Consider adding them to your dessert lineup, by swapping maple syrup out for a scoop of vanilla ice cream. Want to become all-out? Attempt this Chocolate Brownie Waffle Sundae recipe.
Source: https://www.tasteofhome.com/article/how-to-make-waffles-bigger-fluffier-and-better-than-ever/
0 Response to "How to Make Waffles (Bigger, Fluffier and Better Than Ever)"
Post a Comment