How To Craft an Easy Ribbon Heart
If I'one thousand existence completely honest, I'm the kind of crafter and DIY enthusiast who volition happily brand almost anything out of just about annihilation. I take a lot of pride in the fact that I've got a well rounded set of crafting skills that include all dissimilar techniques, simply that doesn't hateful I don't have my favourites or get through phases where I get peculiarly obsessed with one kind of thing for a while. Lately, I've been feeling very enthusiastic near making substantially annihilation that involves working with softer, more fabric based materials and turning them into something with a little more than structure and solid shape. I'g likewise even so in a mushy mood post-Valentine'due south Mean solar day, and so I've found myself making a larger number of heart shaped things than usual lately. There's where this thought of a fun hanging ribbon centre decor piece came from!

Practise you love the thought of turning ribbon into an actual decorative shape but as much as I did, if non more than? Then I think you'll be rather pleased indeed to hear that I made several of these little pieces and fifty-fifty documented the procedure of one then I could share it with other crafters. Check out these step by step instructions consummate with photos! If you'd rather follow along with a video tutorial instead of written words, whorl to the bottom of this post to find just what you're looking for.
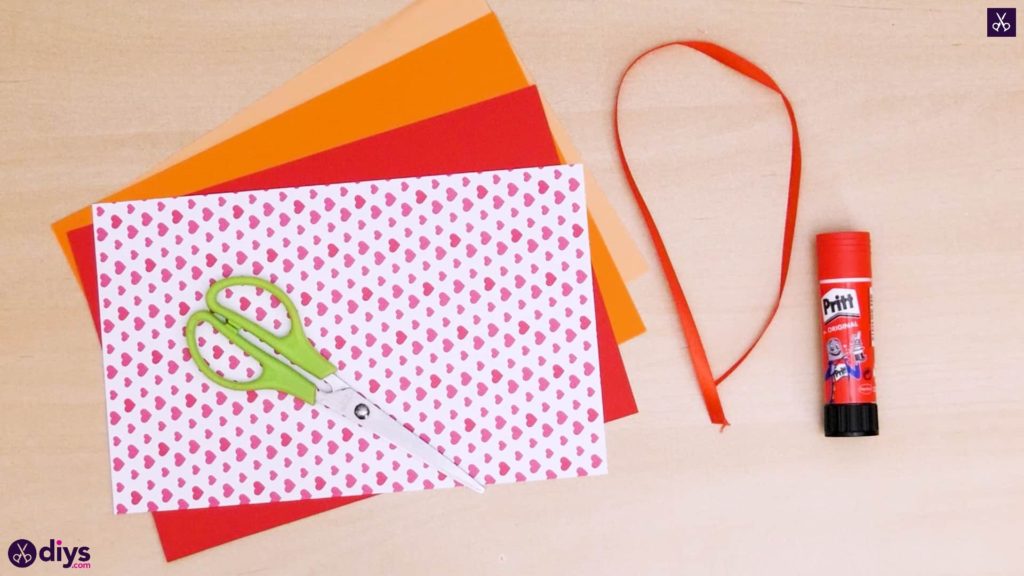
For this projection, you'll need:
- A glue stick
- Pair of scissors
- Paper (reddish, light and night orangish, and multi-coloured)
- Red ribbon
Step 1:
Gather your materials!
Step 2:
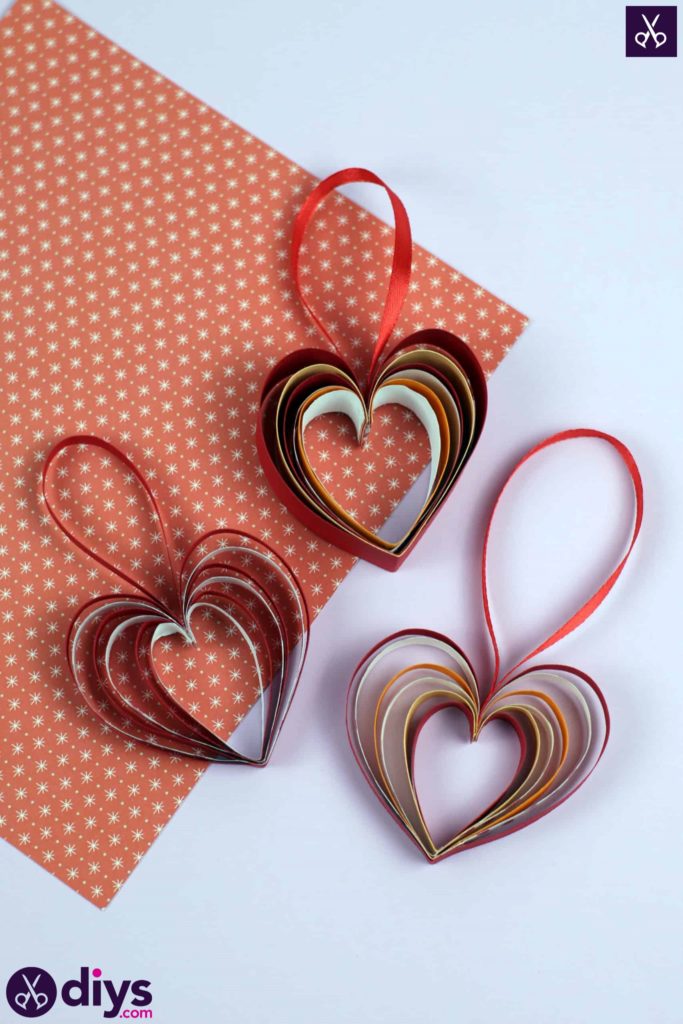
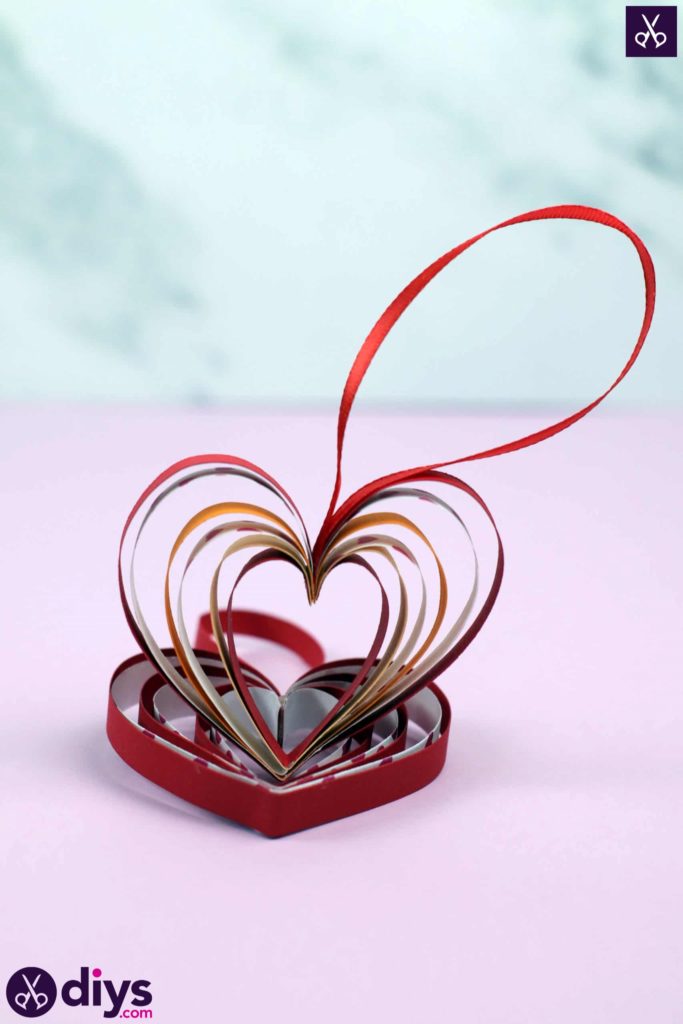
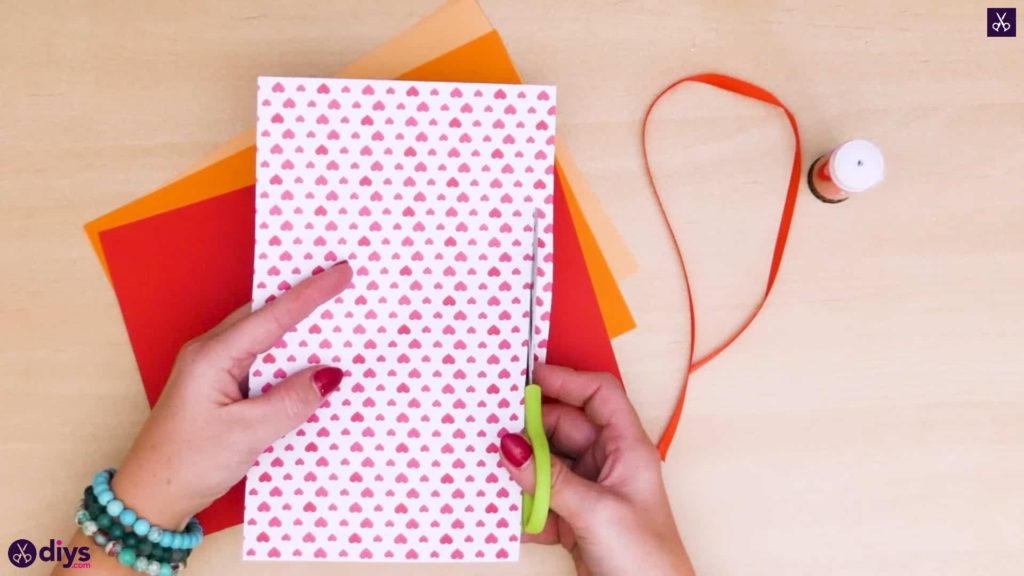
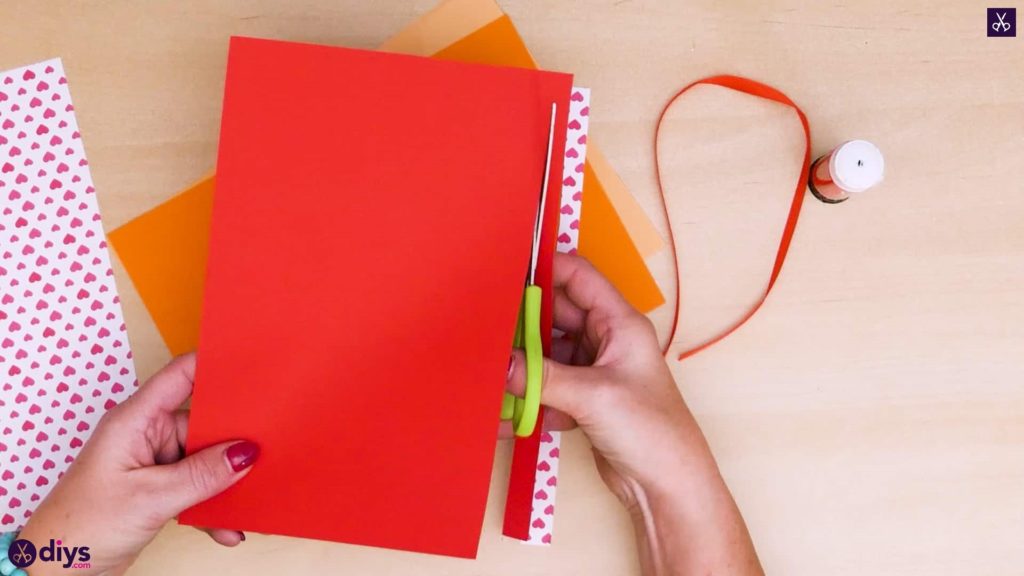
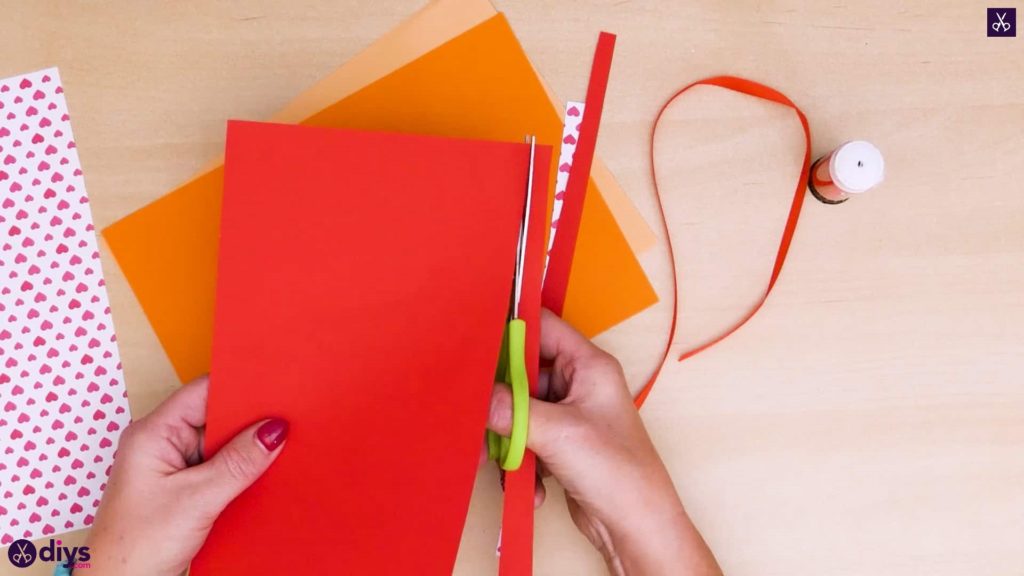
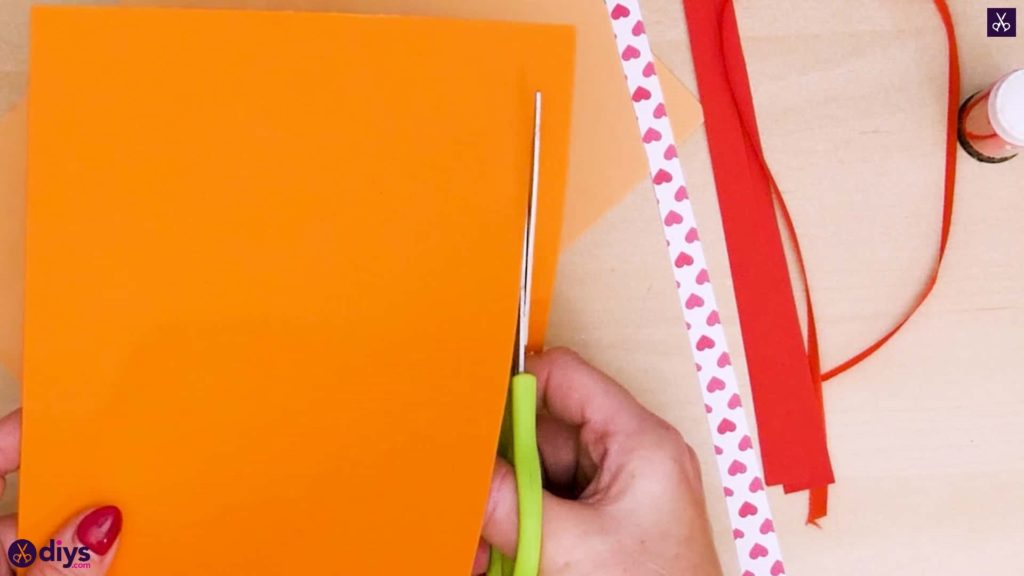
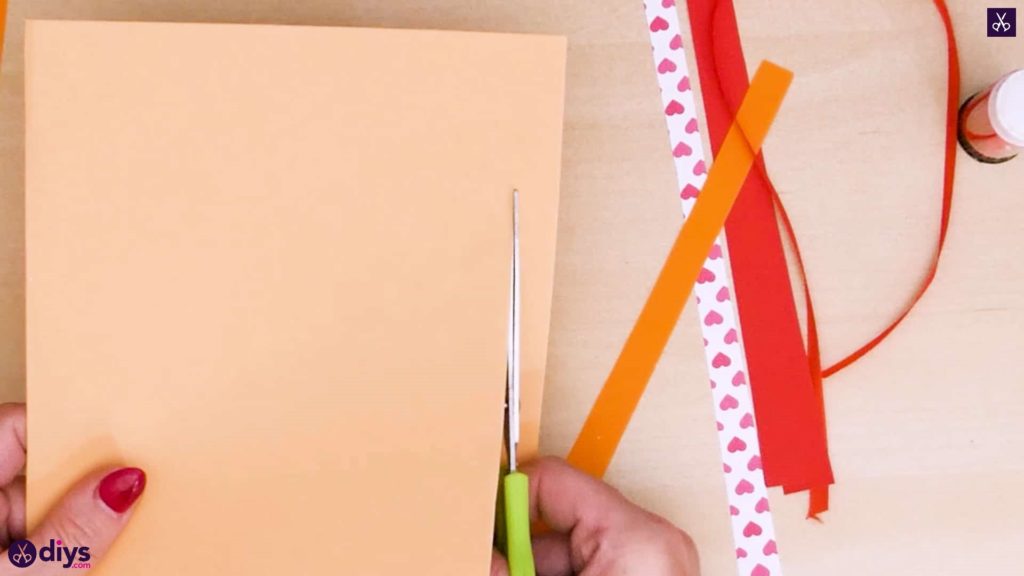
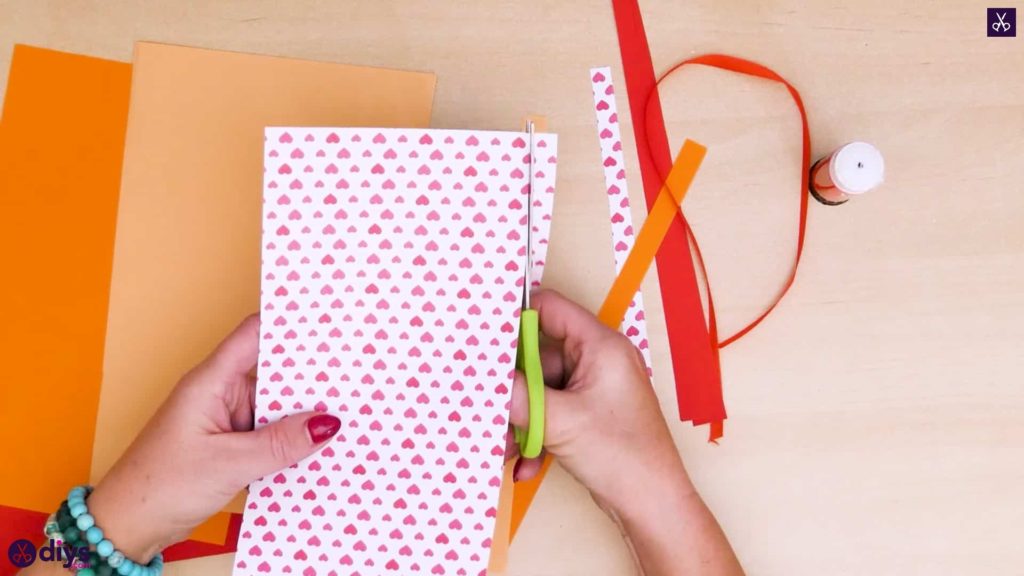
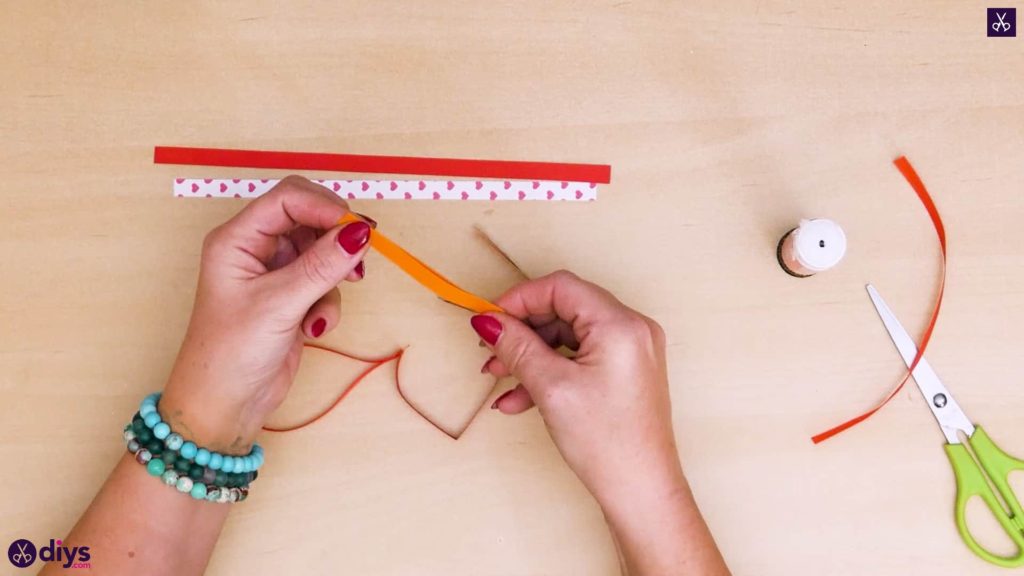
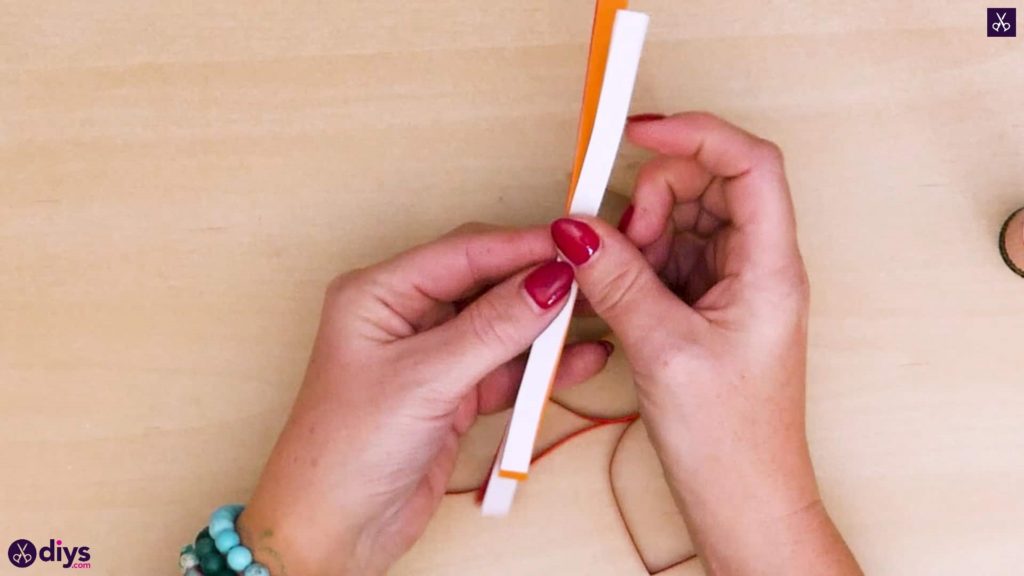
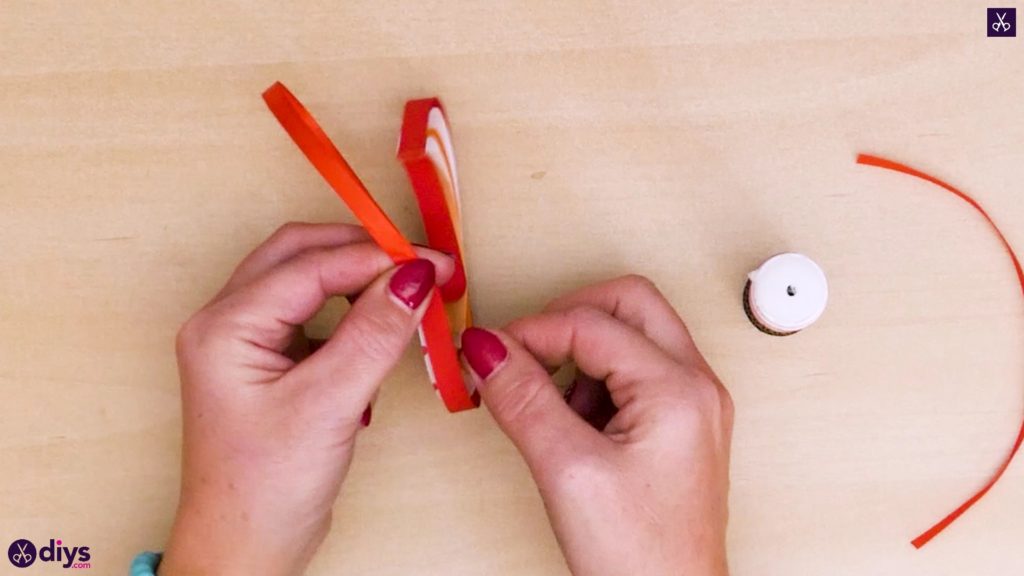
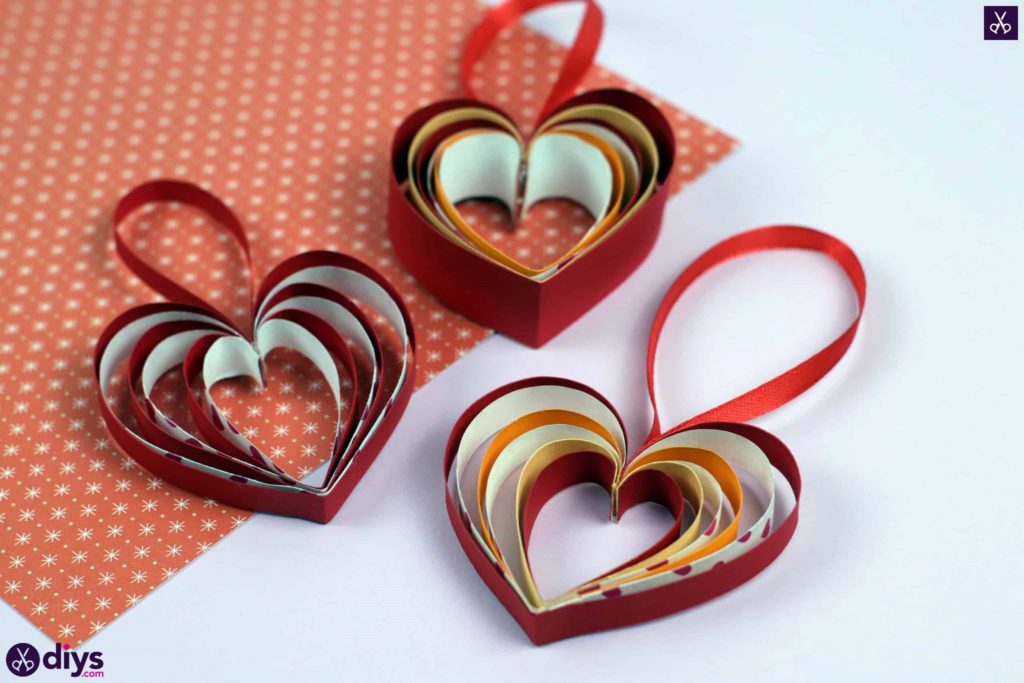
Cutting the paper strips that the torso of your hanging middle will exist made of! Plough each piece of newspaper portrait-wise so the brusk edges of each become the acme and lesser and the long edges of each become the sides. Use your scissors to cut one-half inch wide strips from each folio that are the total length of the piece of paper, from top to bottom. I cut two muti-coloured strips (I chose white paper with pink hearts on information technology), two red strips, ane light orange, and 1 dark orange.
Footstep 3:
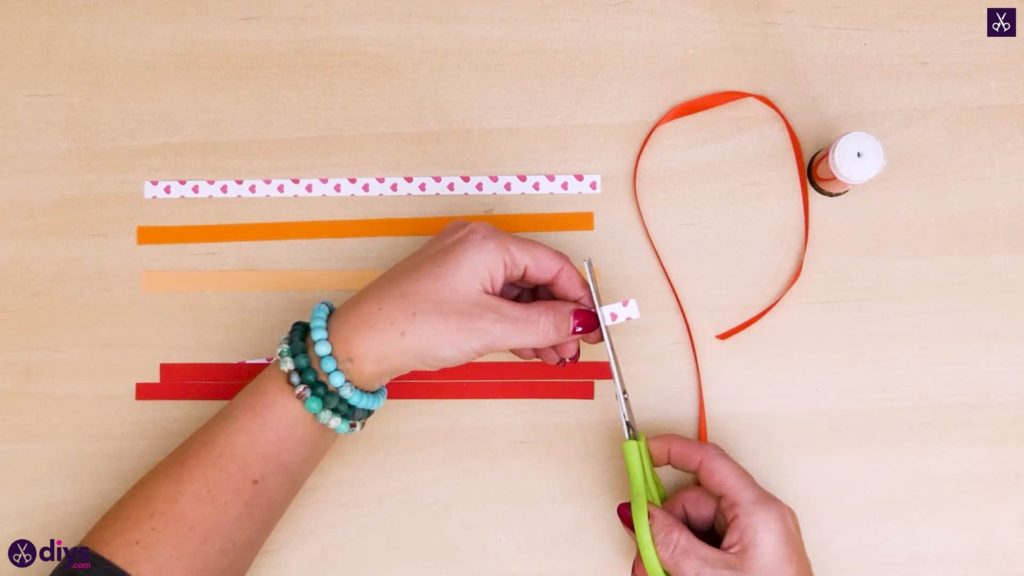
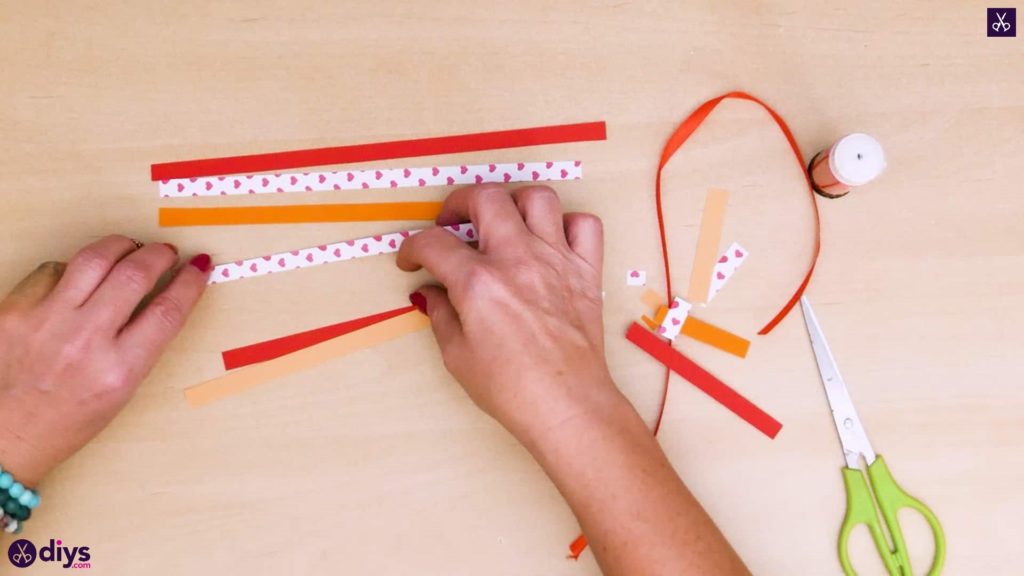
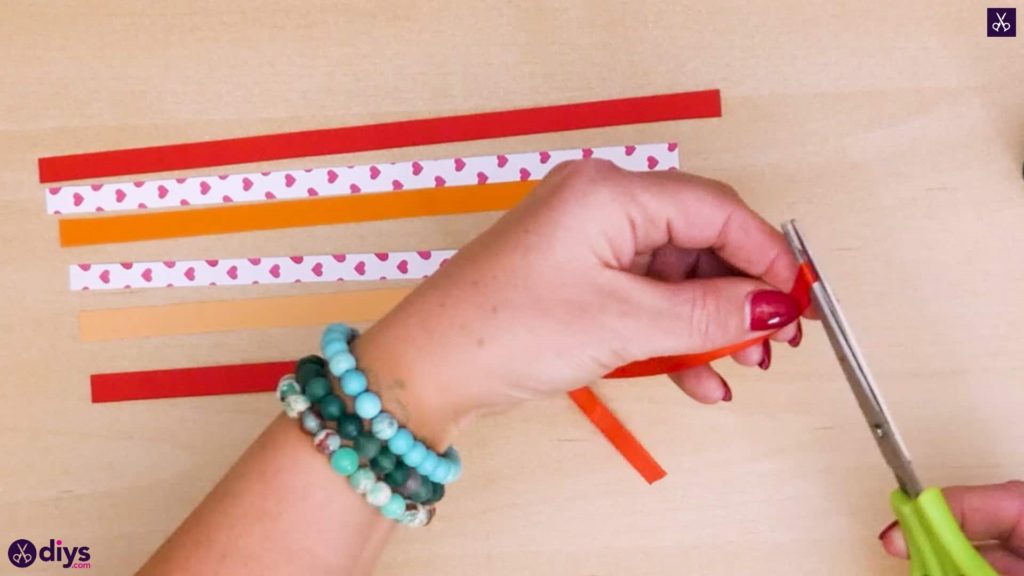
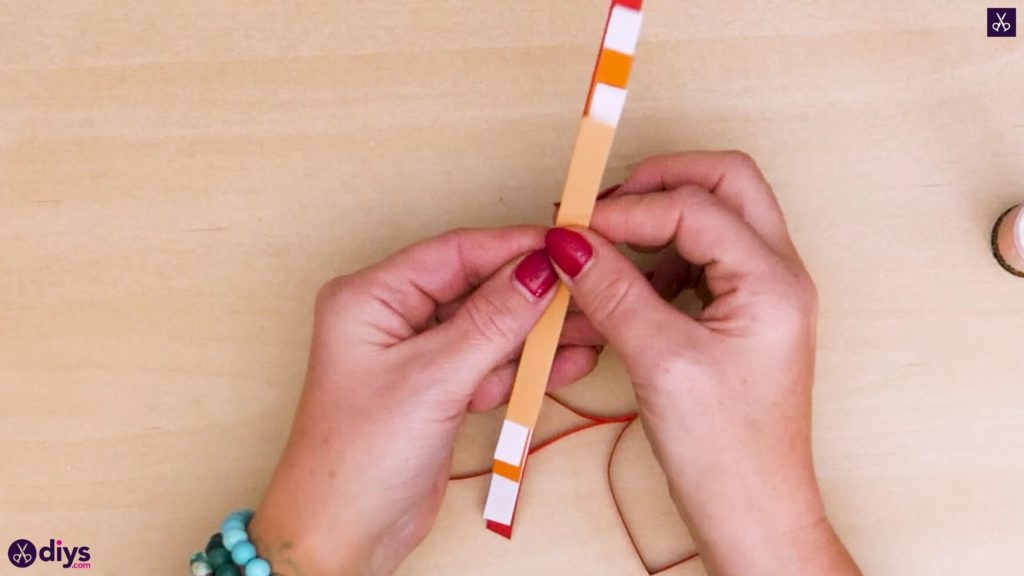
Suit your coloured strips in the lodge you'd like to go in as far every bit colour scheme goes, from exterior to inside. Once you've called which strip will go where, cut them into descending lengths and so you can create the properly sized layers. Leave your very outside strip the way information technology is, so it stays the full length of the folio. Cut nearly half an inch off the side by side one so information technology's a little shorter, and then a full inch off the 3rd one, and so on until each of your strips, when laid out in order, is half an inch smaller than the one before information technology. This will help get y'all the right layered shape considering it ways each middle you make from each strip will be a piffling smaller than the one before it, ensuring that it'll fit within.
Step 4:
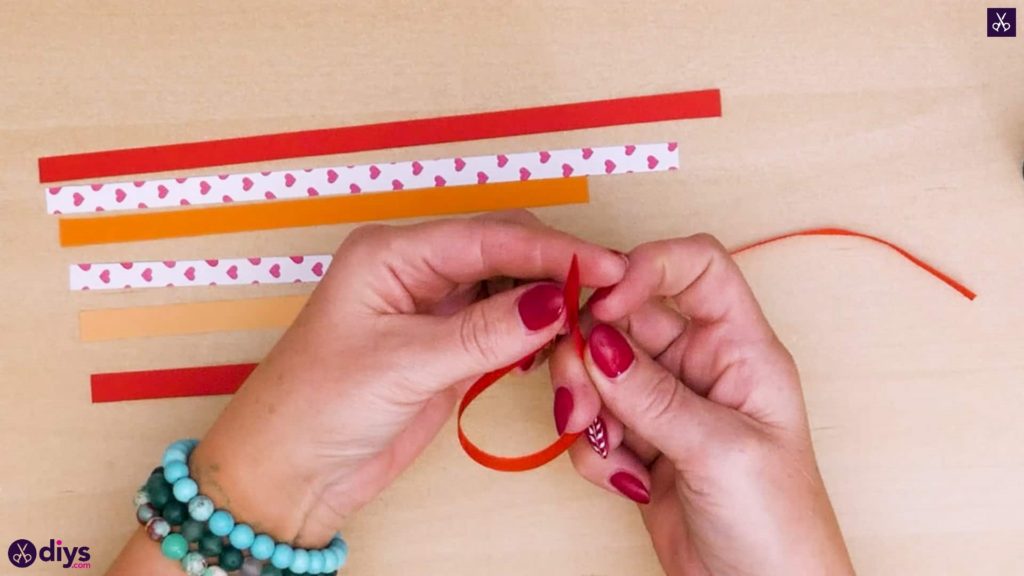
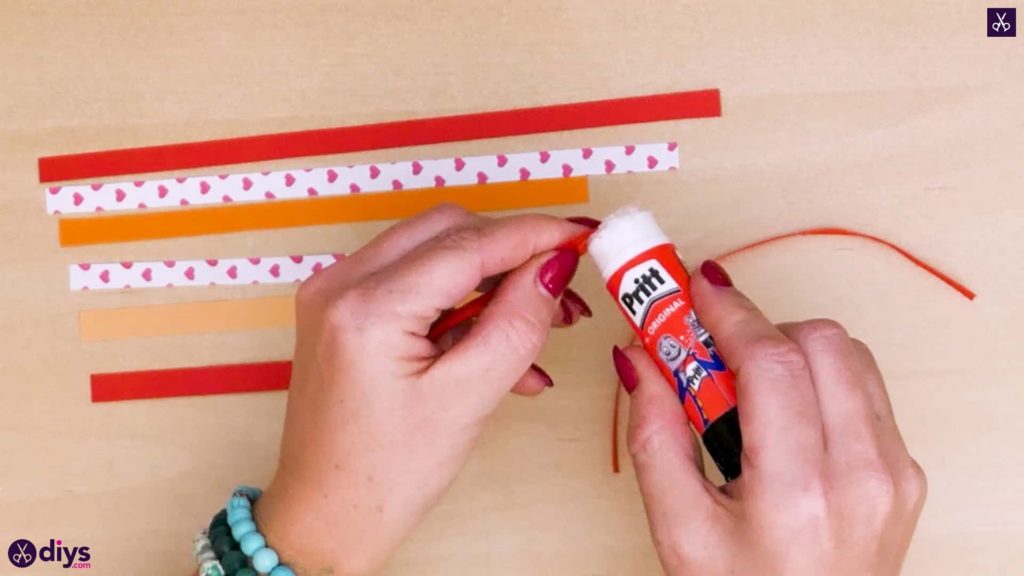
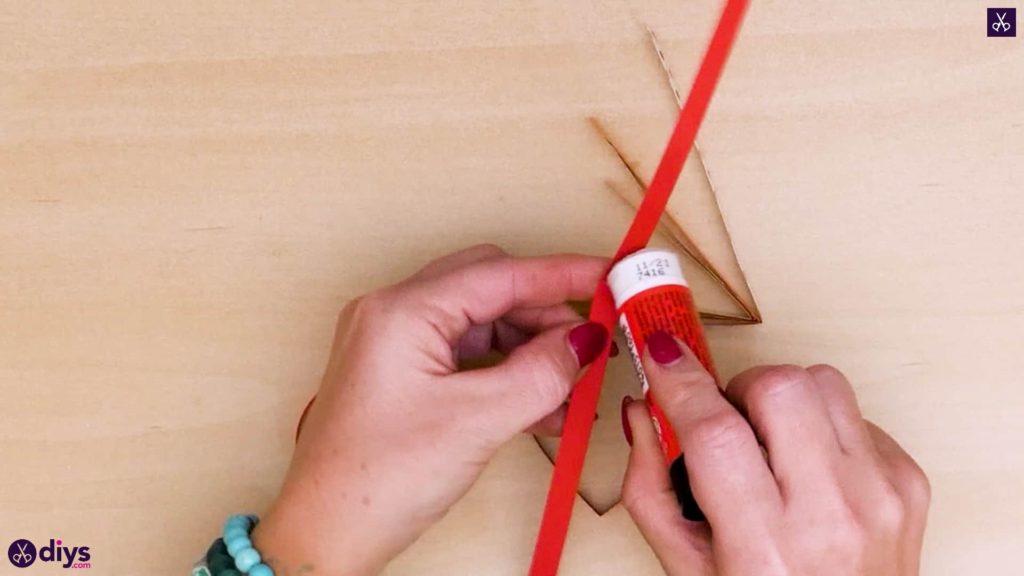
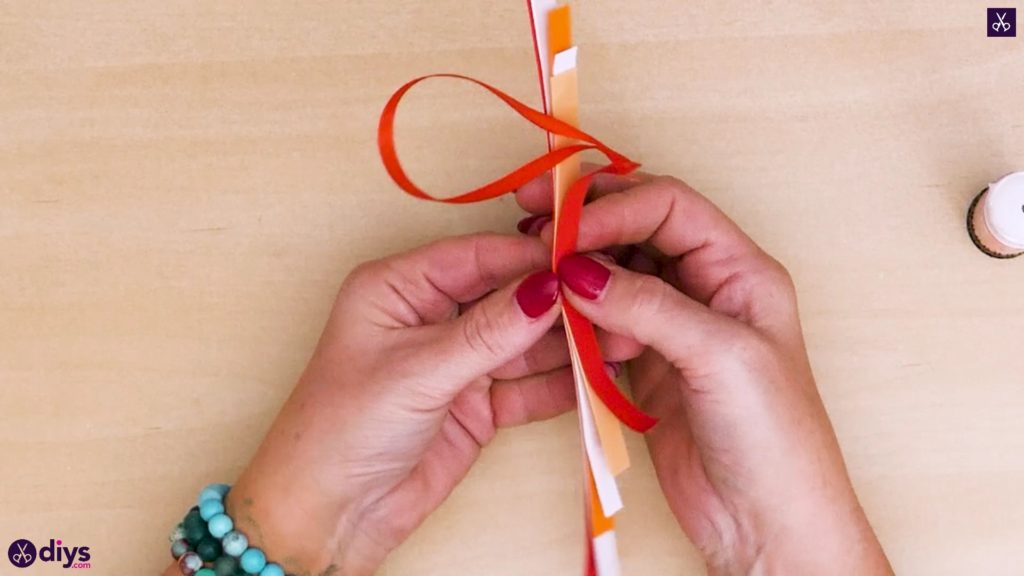
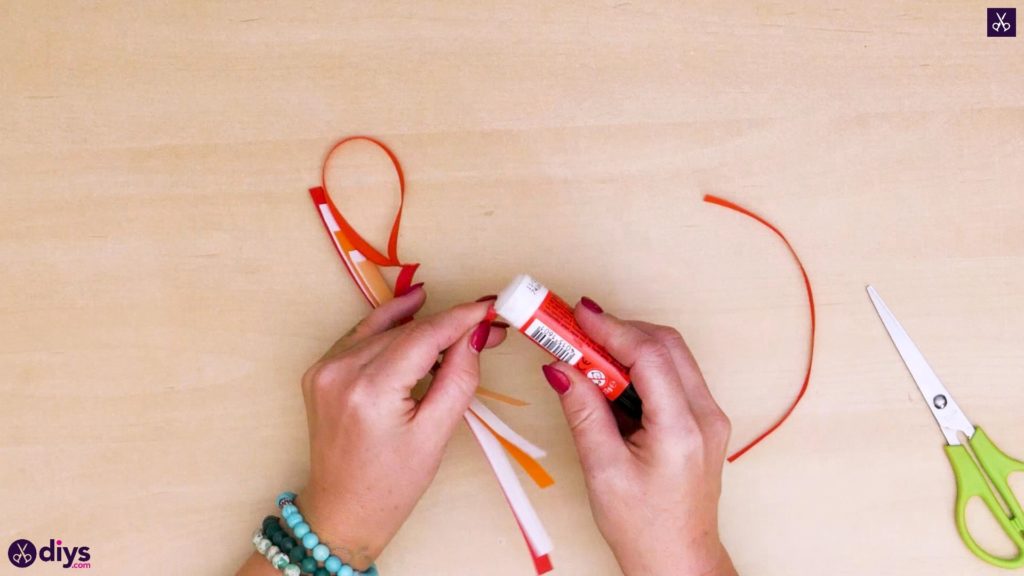
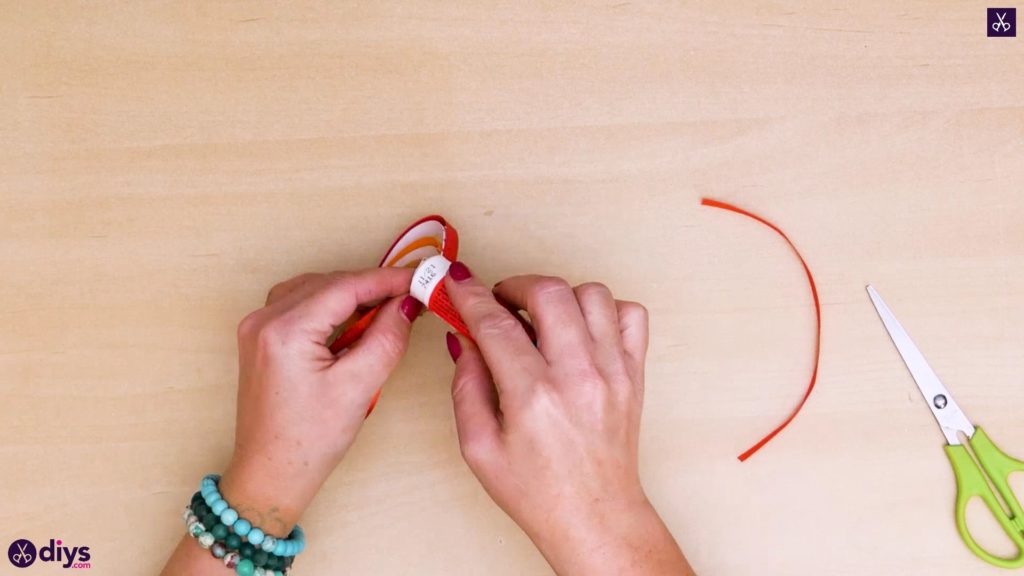
Here'southward where the ribbon comes into play! Cut a slice of red ribbon that's about four inches long. Fold it in half and then the 2 ends run across evenly and the ribbon curves halfway down its length to make a loop. Apply glue to the inside flat surface of the ribbon ends and stick them together flat, and then their tip edges line up. This will exist what yous hang your heart slice from later.
Step 5:
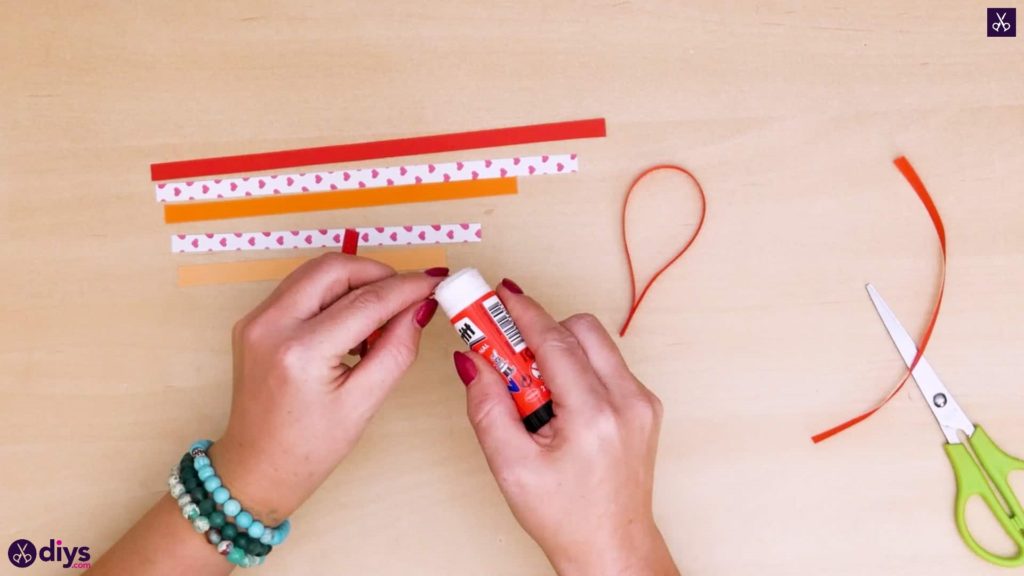
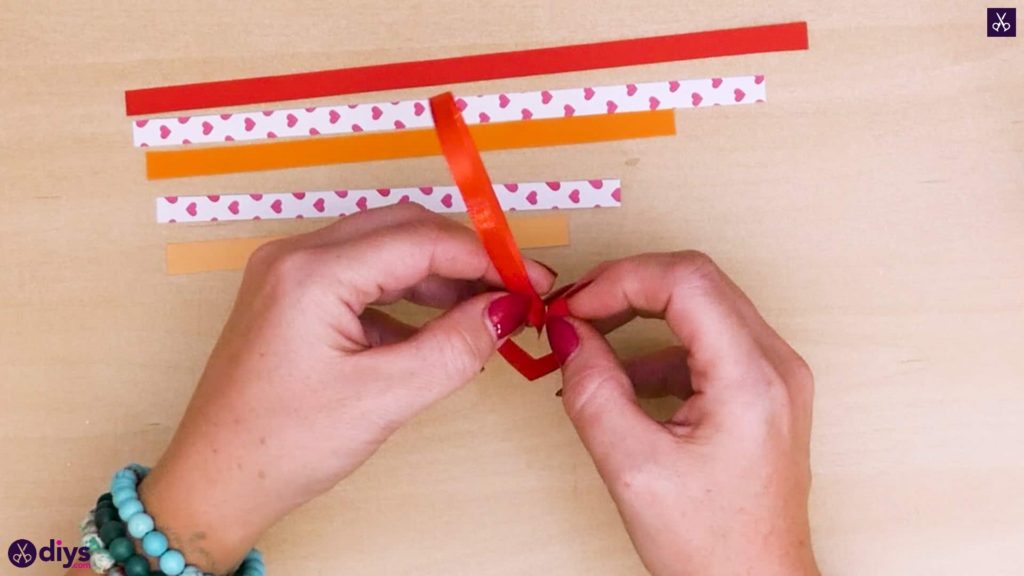
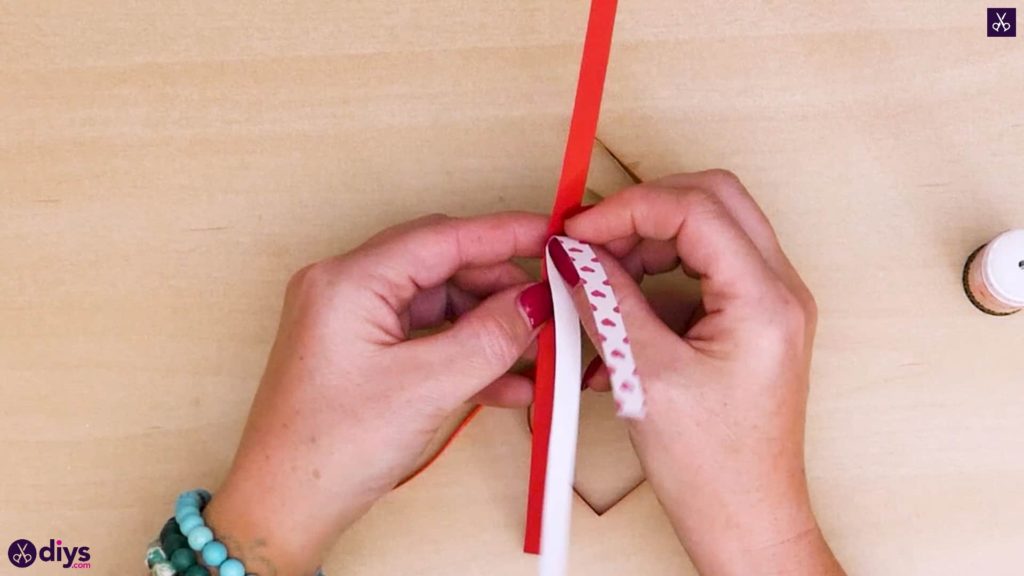
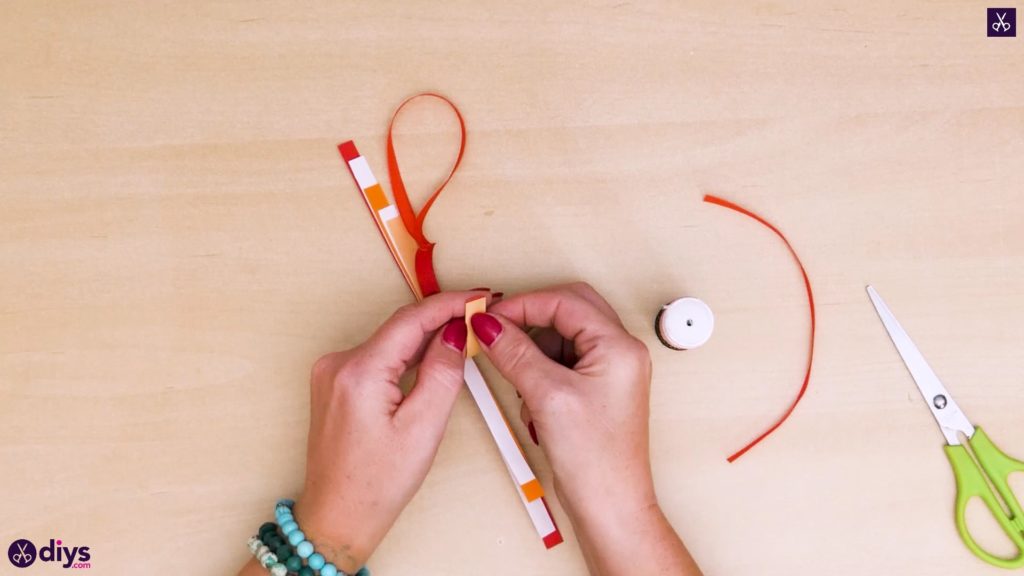
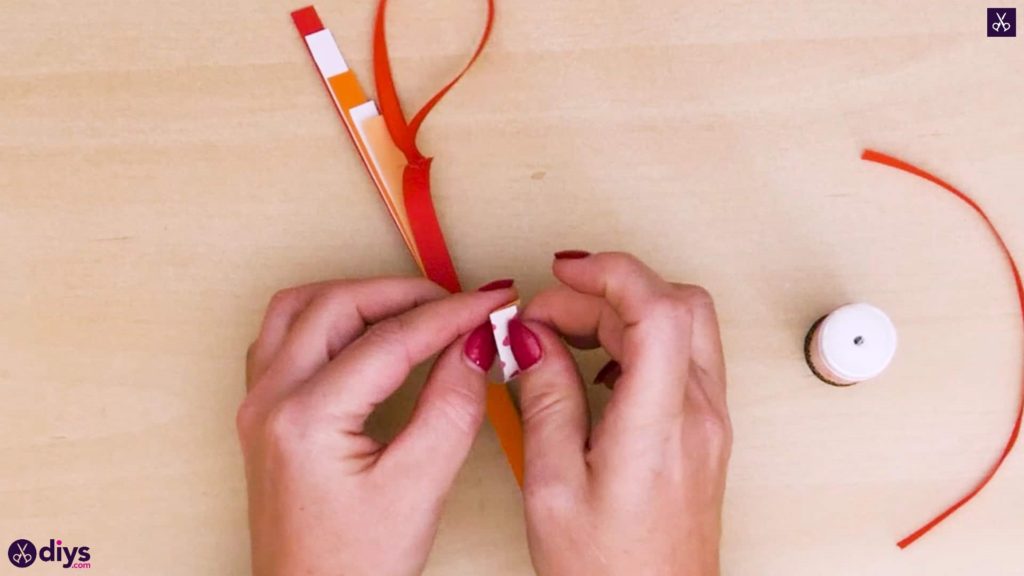
Outset with your shortest piece to make the smallest inside layer of your paper heart hanger. First, fold the piece in half, bringing the two ends together and creasing the paper at the heart betoken where it curves, marking its eye. You'll make a heart shape past curving each one of these ends inwards and downwards, so the tip edges stay even with each other but meeting to rest against their back sides instead of apartment against each other. Before you gum your middle into place, nonetheless, you have to put your ribbon loop in and create your layers so the hearts nest inside i another properly. For now, utilise glue to the exterior finish of one side of your shortest strip, where it met with the other side when you tested out your eye shape. Instead of meeting it upwardly with its other stop, line if upwards with the tip edge of your ribbon loop so the curve of the loop runs forth the rest of the strip and the paper sits flat against the ribbon the aforementioned with the two ribbon ends sit flat confronting each other. Yous'll stop your center shape by bringing the other terminate effectually and gluing information technology into place on the other side of the ribbon loop a little after on.
Step 6:
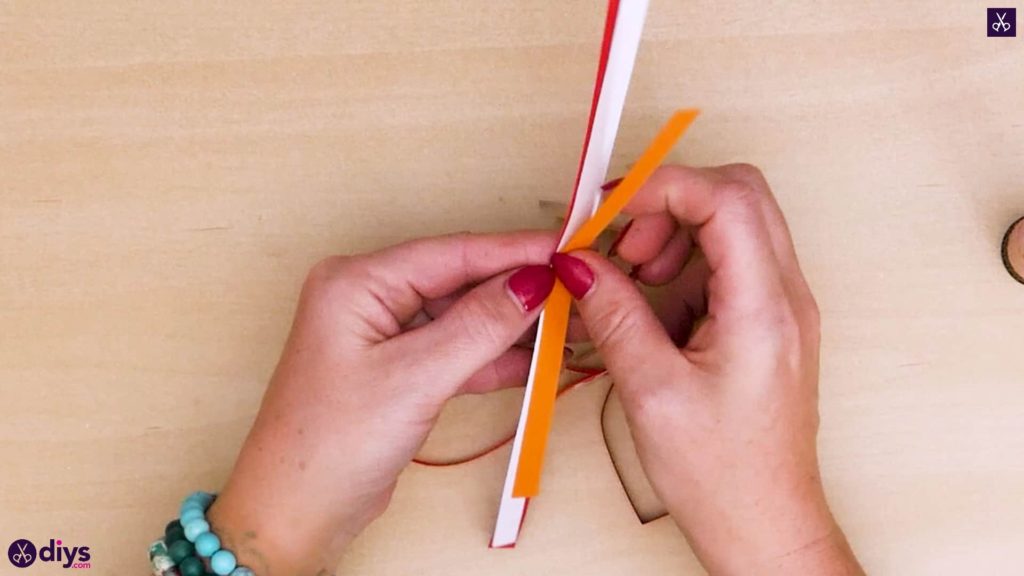
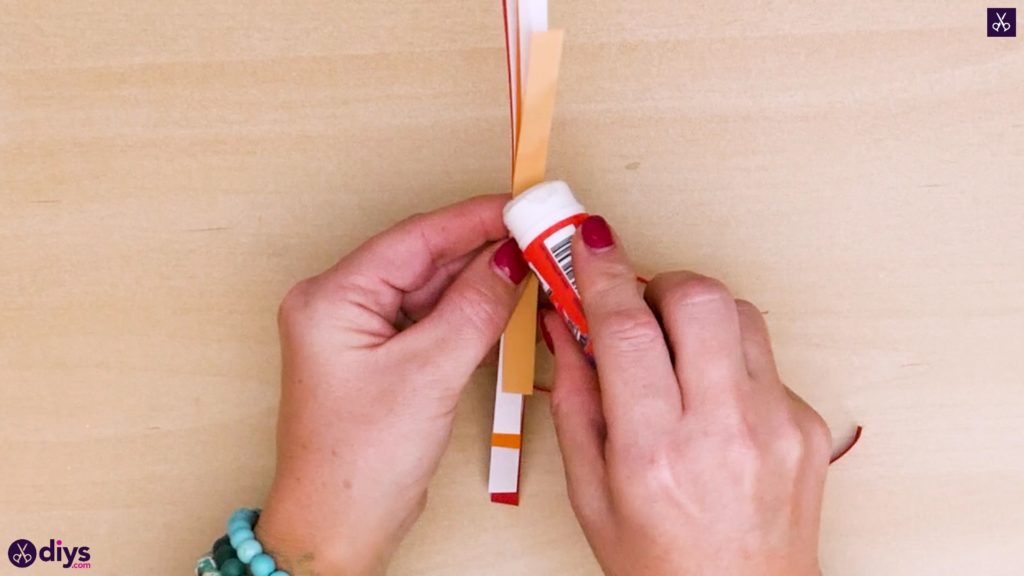
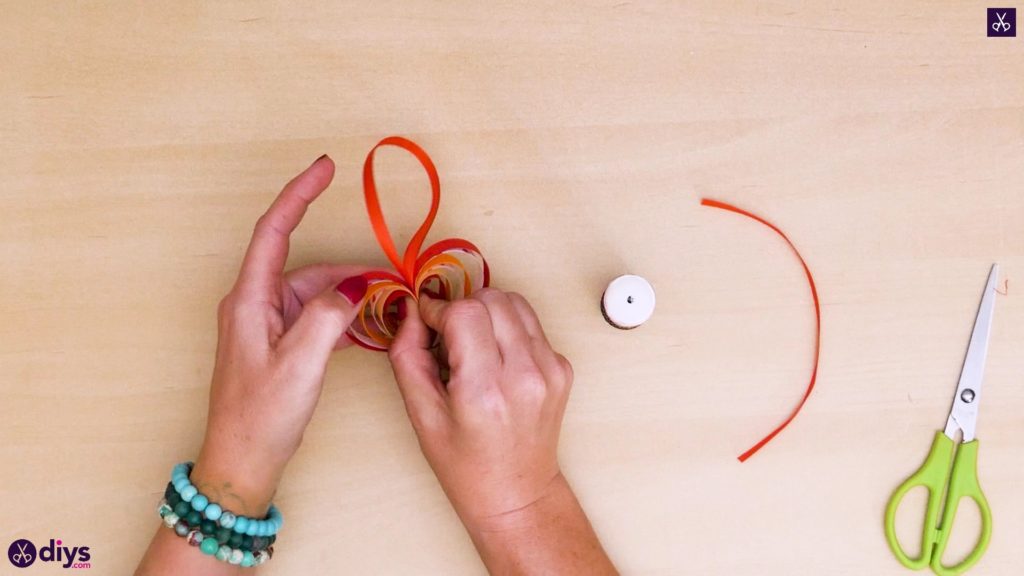
Set your base of operations piece bated and at present fold all of your other strips in half so their ends meet and yous tin make a crease at each half fashion point, only like y'all did with your red slice. Next you lot'll nest them past size, anchoring them at their centres with glue and leaving the ends loose, starting with your longest strip and working your way to the shortest. Apply gum to the within of the crease at the halfway point on your longest strip and nestle the crease of your 2d longest strip there, sticking it into place. Then apply glue to the inside ofthat strip'due south crease and identify the third longest strip there in the same manner. Proceed this process until all of your strips besides the smallest 1 that you already mucilage to the ribbon are layered together according to size. The very last piece that yous fit onto this layered shape will be the smallest strip that y'all already attached a ribbon loop to; you'll stick that on the top so information technology sits at what will eventually exist the centre of the middle.
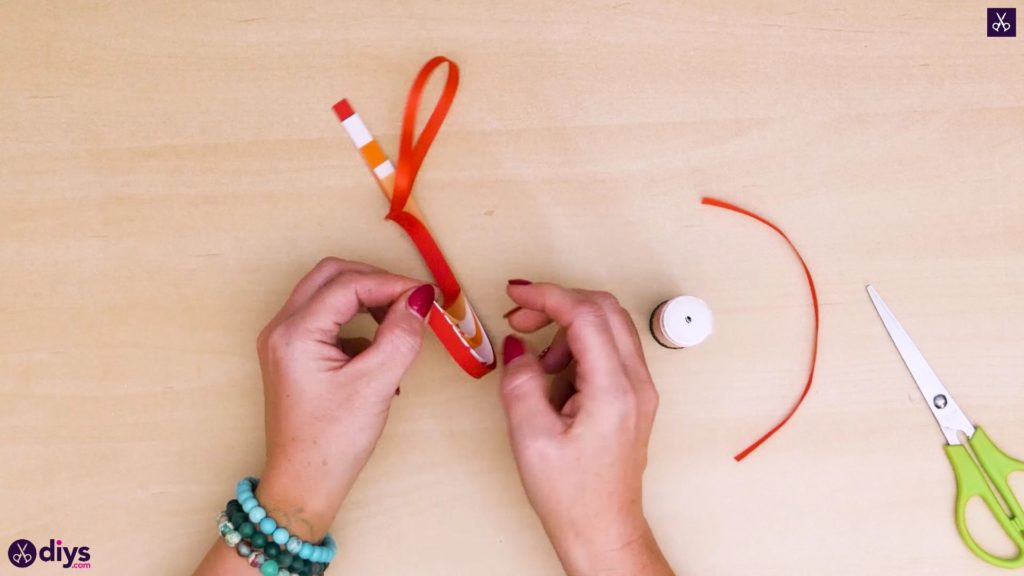
Step 7:
Start creating ane side of your layered eye's rounded top shape and giving the shape some structure! I started with the side that did not already take the ribbon loop attached to it. Bend the free side of your shortest centre strip in and upwards and then y'all can apply some mucilage to the tip border on the side that was facing downwardly towards the other strips it was layered on top of. Holding that piece in place, bend the strip underneath it upwards every bit well and stick information technology down confronting the showtime strip so their very ends meet evenly at the edges and the two sit flat against each other. Considering the second strip is a little longer, it will bend away from the first a lilliputian, leaving some curved space between the 2. This will be part of what helps make your structured heart shape. Now utilize glue on the side of the second strip that isn't stuck to the first and bend the third strip in the layers up the aforementioned way to run into the border of the second one, creating the same kind of infinite. Repeat this process with all the strips on that side until all their ends are gathered evenly together and you take a tapered package that sort of blooms outwards from that signal.
Step 8:
Echo the strip layering process that you simply did on your first side once more on your second side. Your loop is already in that location to marking the shape you'll eventually create, but you'll be able to slot your strip ends down close betwixt the starting time fundamental strip and the ribbon for an even centre and build from at that place. Now your 2nd side tapers and blooms the same way as your first.
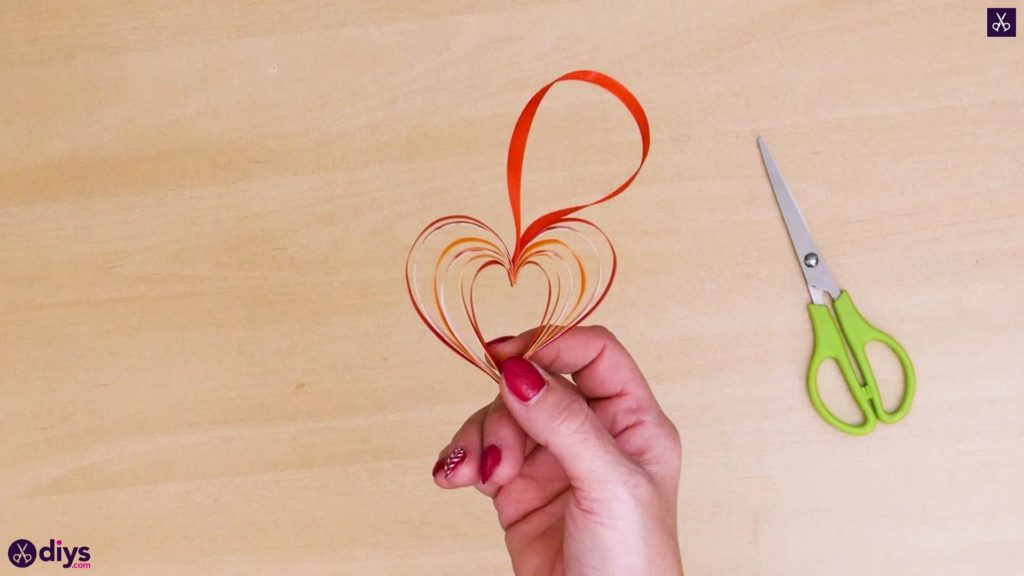
Stride ix :
Curve and plow the gathered ends as one on either side so their underside (the unglued side of your longest strip that you stuck in place concluding or the side with the ribbon attached to it) meets up with and sits evenly against the ends of the other side. You should meet the tapered pieces pointing downwardly to make the middle tip in the superlative of your center and the loop pointing up. The strips and curved spaces betwixt them, however, will create the rounded shapes on either side that make up the top of your eye, while the layered creases beneath give you the heart's bottom tip.
Just in instance yous'd like to endeavor this project out for yourself, hither'south a fantastic tutorial video to help you!
Source: https://www.diys.com/easy-ribbon-heart/
0 Response to "How To Craft an Easy Ribbon Heart"
Post a Comment